Configuring your Windows development machine for data science
Created:
Topic: Development tools
Introduction
In this post, I’ll show you how you can set up your Windows development machine for data science projects. I assume that you have Windows 11 installed on your machine, and no other applications or packages related to data science. I like to configure my machine using VS Code, WSL, Ubuntu, Zsh, Miniconda, and Git, so that’s what I’ll be showing you in this post. If you’re new to data science, I recommend that you follow the same technology choices — with time, you’ll develop your own preferences. If you’re a seasoned data scientist, you can follow the sections that match your preferences and complement them with your own favorite technologies.
Let’s get started!
VS Code
VS Code is my editor of choice. It’s great for so many reasons, but especially because it integrates well with the Windows Subsystem for Linux (WSL for short). You can download and install the Windows version of VS Code from this page. Once you’ve got VS Code installed and running, choose Extensions in the left navigation pane, search for the “WSL” extension from Microsoft and install it:

Windows Subsystem for Linux
The next step in our setup is to install WSL, which enables us to use Linux directly on a Windows machine, without the overhead of a traditional virtual machine or dual-boot setup. As a former Linux user, WSL has been a game-changer for me on Windows. I’ve been using WSL since its early beta days, and I love how much easier it is to install now, and how stable it is.
In order to get WSL set up on your machine, you need to enable the “Virtual Machine Platform” feature on Windows. You can do that by typing “Turn Windows features on or off” in the taskbar’s search field:

Then check the checkbox near “Virtual Machine Platform”:

Next, open the Microsoft Store app, search for “Windows Subsystem for Linux” by “Microsoft Corporation,” and install it:

If you run into issues or need more detailed steps, I recommend that you read this tutorial.
Ubuntu
You can also use the Microsoft Store to install whichever Linux distribution you want to use with WSL. I generally use Ubuntu, so that’s what I’ll show here. If you search for “Ubuntu” in the Microsoft store, you might see something similar to this:

You can pick a specific version of Ubuntu, but I prefer to choose the option without a version, which automatically upgrades to the latest stable version.
Once Ubuntu finishes installing, open the app. This launches a terminal window, where you’ll be prompted to supply a username and password for the newly created Linux administrator account. These are the credentials you’ll need to enter whenever you execute a command with “sudo” to elevate privileges, so choose wisely.
Zsh
The Zsh shell is an alternative to the default Bash shell. If you’re happy with Bash and want to keep your machine setup simple, you can skip this section. I like to use Zsh because it supports everything that Bash supports, with several useful additional features: it has much smarter support for tab auto-completion, it includes many commonly used aliases, and it shares command history across active shells.
If you don’t already have an Ubuntu terminal window open, search for and start the “Terminal” app. Click on the downward-pointing chevron in the title bar and select the “Ubuntu” option to open a new tab that’s running Ubuntu. To install Zsh, type the following command and enter your administrator password if you’re asked for credentials:
sudo apt-get install zsh
The first time you run Zsh, you will be asked how you want to create your .zshrc configuration file:
zsh
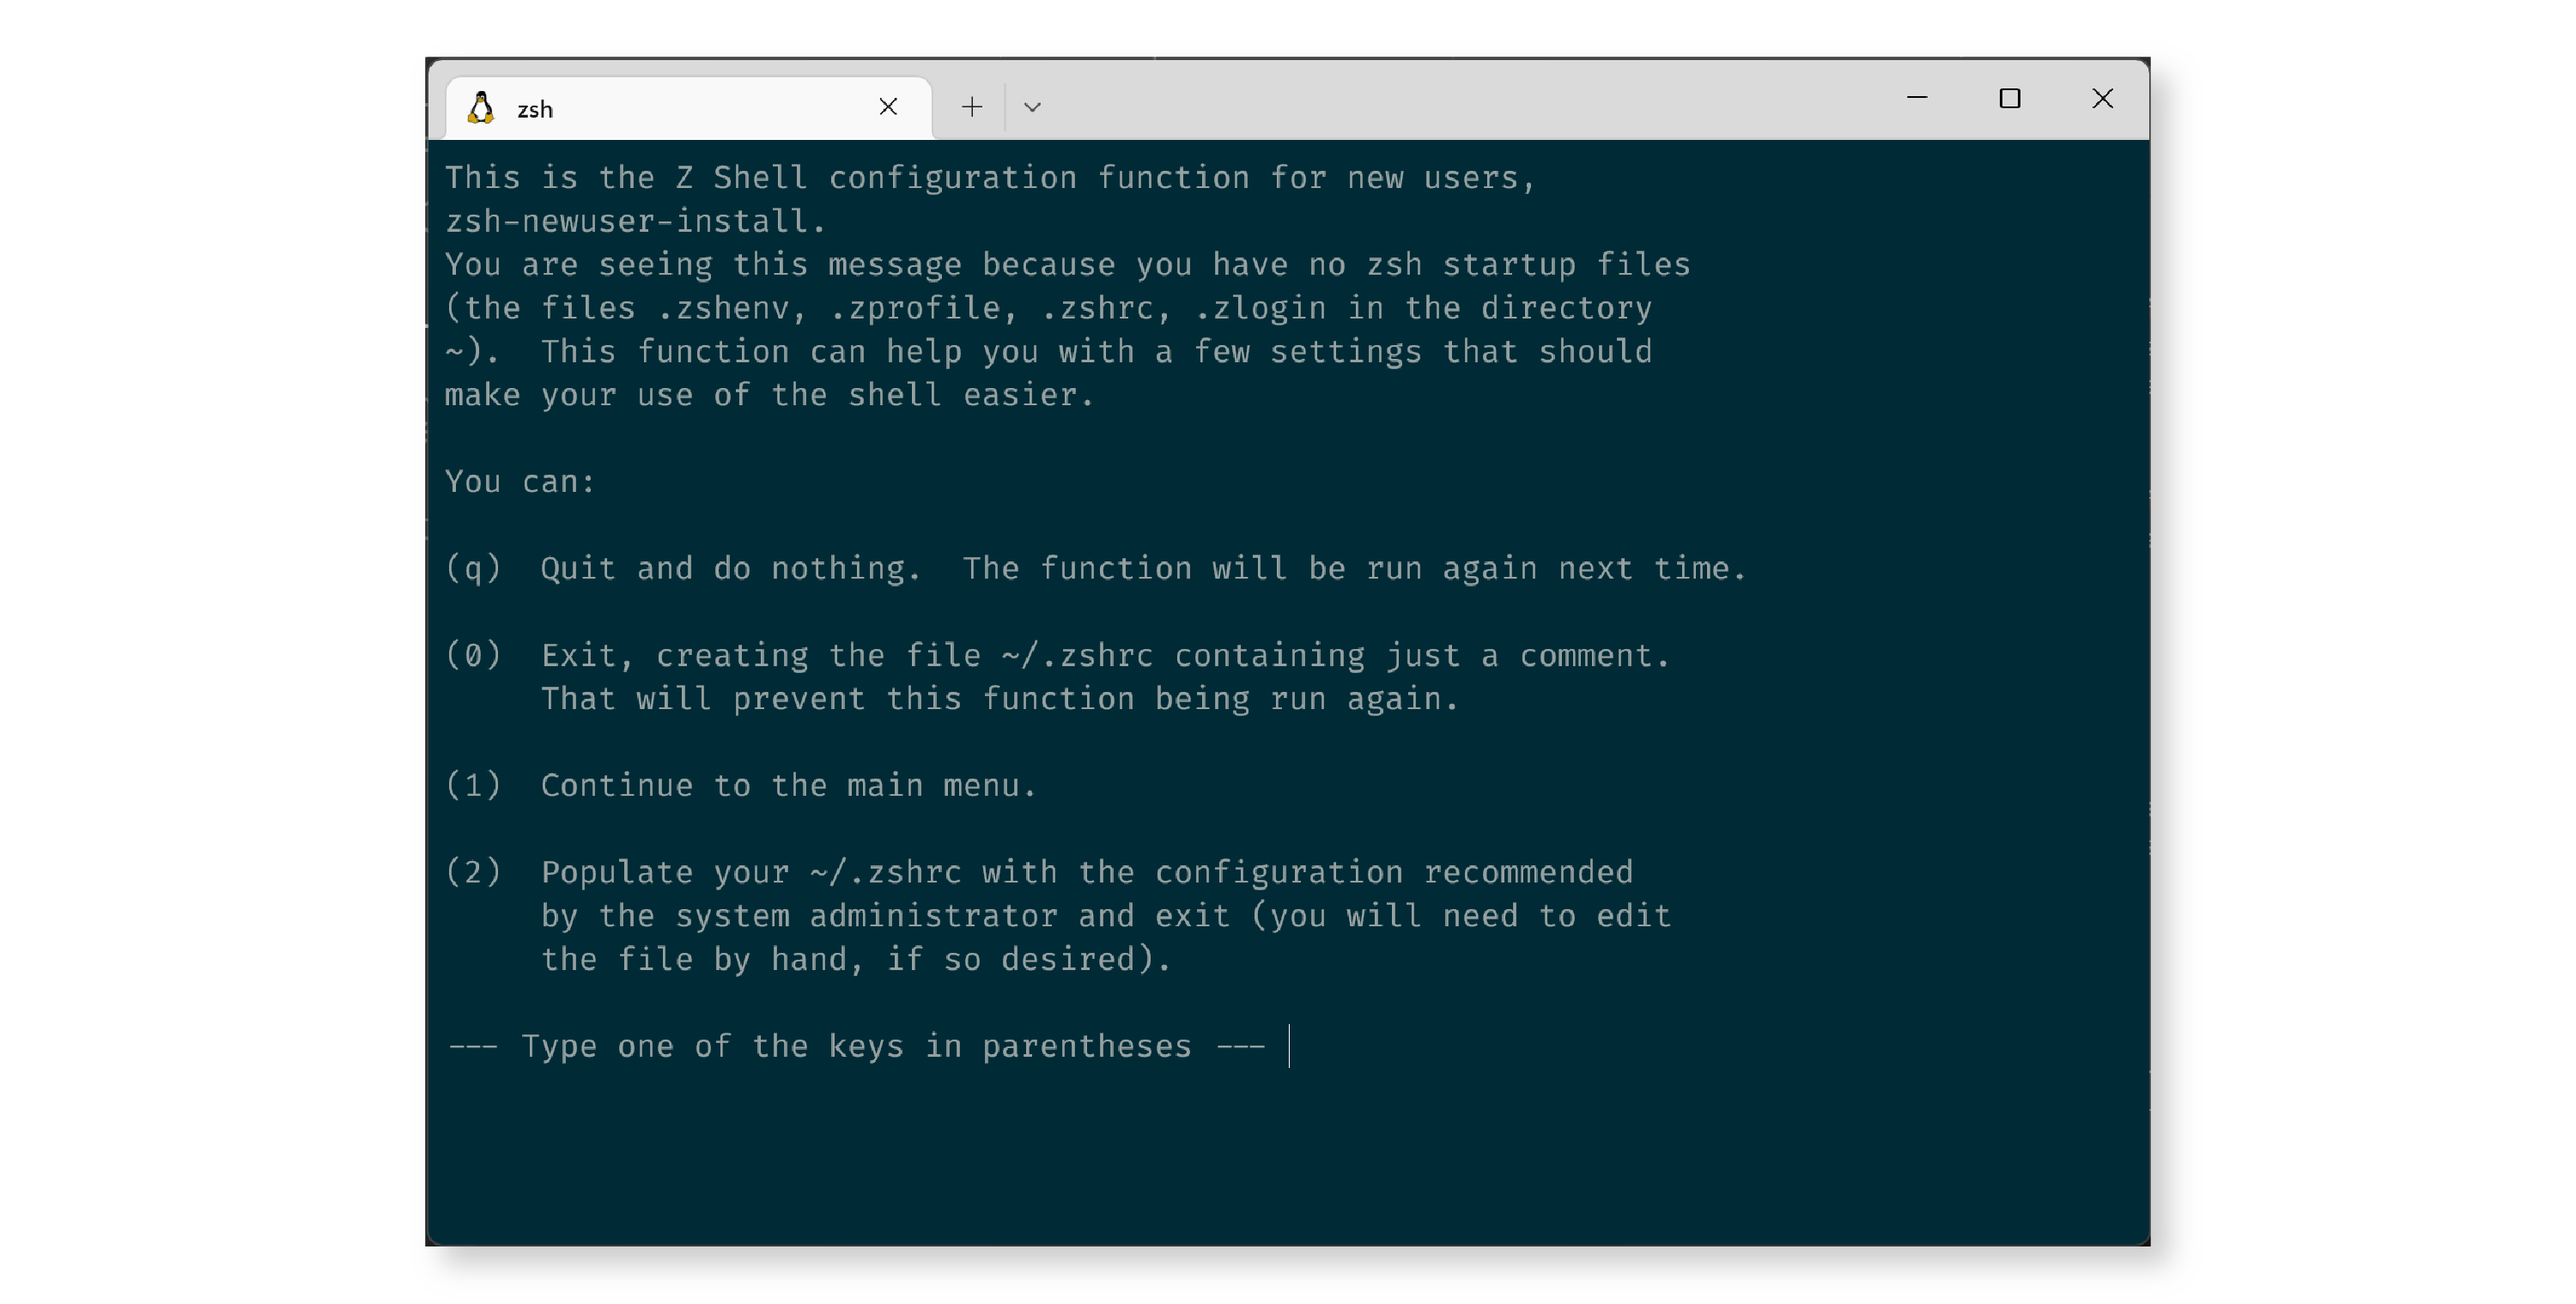
I generally select option 0, which creates the .zshrc file with just a comment. We’ll customize this file in a later step.
Next, I like to install Oh My Zsh, which is an open source, community-driven framework for managing your Zsh configuration. It provides you with a wide range of plugins and themes, and it has a vibrant community of users. It’s my framework of choice for managing Zsh. Here’s how we can install it:
sh -c "$(curl -fsSL https://raw.github.com/ohmyzsh/ohmyzsh/master/tools/install.sh)"
We’ll configure Oh My Zsh later in this post, by adding a few plugins to the .zshrc configuration file.
Miniconda
When coding with Python, it’s convenient to have a tool that manages our packages and environments for each project. It’s common for different projects to use different versions of the same packages, which can make switching from one project to the next unwieldy. That’s where tools like Miniconda come in: they enable us to switch from one set of dependencies to another with a single command. There are many other package managers with similar goals, such as Conda, pip, and venv. I prefer Miniconda to Conda because I don’t need most of the extra functionality that comes with Conda, such as support for programming languages other than Python. And I like both Miniconda and Conda better than other package managers I’ve used because they help me manage the version of Python itself, in addition to all other packages that my project needs.
You can find the installation links for Miniconda on this page. For a WSL setup, you’ll need to choose the “Miniconda3 Linux 64-bit” version. Clicking on the link will download a file with extension .sh. You can install it by copying it to a suitable location within Ubuntu, and then running the following command:
sh ./Miniconda3-latest-Linux-x86_64.sh
You need the Linux version, rather than the Windows version, because you’ll be doing your package management from within WSL, not Windows!
Git
I use Git (in conjunction with GitHub) for source code management — who doesn’t, these days? I like to be able to run Git commands both from within VS Code (which runs on Windows) and from the terminal (which is running Linux). I prefer VS Code’s user interface for common operations like creating branches, committing and pushing changes, and pulling the latest code; but I still want access to Git in my Linux terminal for more advanced operations. Therefore, I configure Git twice — once for Windows and once for Linux.
Thankfully the steps you need to follow on Windows and Linux are pretty much the same, the only difference being that on Windows you execute them using the Git Bash app, and on Linux you execute them within your terminal. The GitHub web site provides excellent documentation on how to set up Git, so I’ll just link to the appropriate pages. Note that these pages contain steps for both Windows and Linux, so be sure to follow the instructions on each of those tabs:
- Step 1: Generate a new SSH key and add it to the ssh-agent
- Step 2: Add a new SSH key to your GitHub account
- Step 3: Configure your username
- Step 4: Configure your email
Terminal
For the most part, there are no right or wrong decisions in terminal configuration — it all comes down to personal choice. I’ve settled on the look shown below, which I’ll explain how to configure in this section:

The Windows “Terminal” app allows you to open multiple terminal tabs, using any number of different profiles. You can see all your profiles by clicking on the downward-pointing chevron in the title bar. For example, I have “Windows PowerShell,” “Command Prompt,” “Azure Cloud Shell,” and “Ubuntu”:

For the purpose of data science, we’ll be using the “Ubuntu” profile, so that’s what I’ll focus on in this section. We’ll start by configuring the settings of the Terminal app (such as the default profile), and then we’ll adjust the Linux settings (such as the Oh My Zsh plugins).
You can change your Terminal settings by clicking on the downward-pointing chevron and selecting “Settings,” which opens the Startup settings by default. I changed my “default profile” setting to “Ubuntu,” since that’s the profile I want to use when I create a new tab in the app.

Next let’s configure the appearance of our terminal window. The Terminal app comes pre-packaged with several different color schemes, and you could simply select one that works for you. Or, if you’re like me, you’ll want to fully configure your own. To do that, click on “Open JSON file” at the bottom left of the window, and add a new color scheme to the “schemes” section. Here’s the one I use:
{
    "background": "#002B36",
    "black": "#002B36",
    "blue": "#268BD2",
    "brightBlack": "#657B83",
    "brightBlue": "#839496",
    "brightCyan": "#D33682",
    "brightGreen": "#B58900",
    "brightPurple": "#EEE8D5",
    "brightRed": "#CB4B16",
    "brightWhite": "#FDF6E3",
    "brightYellow": "#586E75",
    "cursorColor": "#FFFFFF",
    "cyan": "#2AA198",
    "foreground": "#96A1A1",
    "green": "#859900",
    "name": "wsl",
    "purple": "#6C71C4",
    "red": "#DC322F",
    "selectionBackground": "#FFFFFF",
    "white": "#93A1A1",
    "yellow": "#B58900"
}
Notice that the “name” of this color scheme is set to “wsl.” To use it, click on your default Ubuntu profile, scroll down to “Additional settings,” click on “Appearance,” and select “wsl” from the drop-down menu.
I also like to use the “Fira code” font, which doesn’t come pre-installed with Windows. To install it, I download it from this page, select all files in the “static” directory, right-click, and select “Install.” I can then use it by setting the “Font face” to “Fira Code” in the “Appearance” settings:

To configure the Linux settings, I clone my dotfiles repo and run its installation script:
git clone git@github.com:bstollnitz/dotfiles.git
cd dotfiles
./install.sh
My dotfiles Git repo contains all the files I need to configure my Linux terminal, and an install.sh main executable shell file that kicks off the process. The commands in this repo set up Zsh, Oh My Zsh, and the Spaceship custom theme for the prompt. You can read about the contents of these scripts in detail in my blog post about configuring my terminal for Codespaces. That blog is written with GitHub Codespaces in mind because automating the Linux terminal configuration is particularly useful in that context. Every time I create a new Codespace (which if often!), I automatically get a nicely configured Linux terminal to work with. But the same dotfiles are useful when setting up a new machine, or in any other scenario where you need a familiar terminal configuration.
Conclusion
In this post, we started with a machine containing nothing but Windows 11, and ended up with a machine that’s ready to tackle data science projects. We installed VS Code, WSL, Ubuntu, Zsh, and Miniconda, and then proceeded to configure Git and our terminal.
You may be wondering why I didn’t talk about installing Python and popular data science packages like PyTorch, Numpy, and Pandas. That’s because I may want to configure those dependencies differently for each project, as I explain in my post about setting up machine learning projects.
Hopefully this article has helped you to configure your Windows machine, and you’re now well on your way to focusing on the best part of your job: solving data science problems! Thank you for reading!